

Getting your way around in Ableton can be a real pain, but it doesn’t have to be. Let’s have a look at some of my top secret tips and tricks that you can start using to make your experience in Ableton much smoother.
Watch the full tutorial:
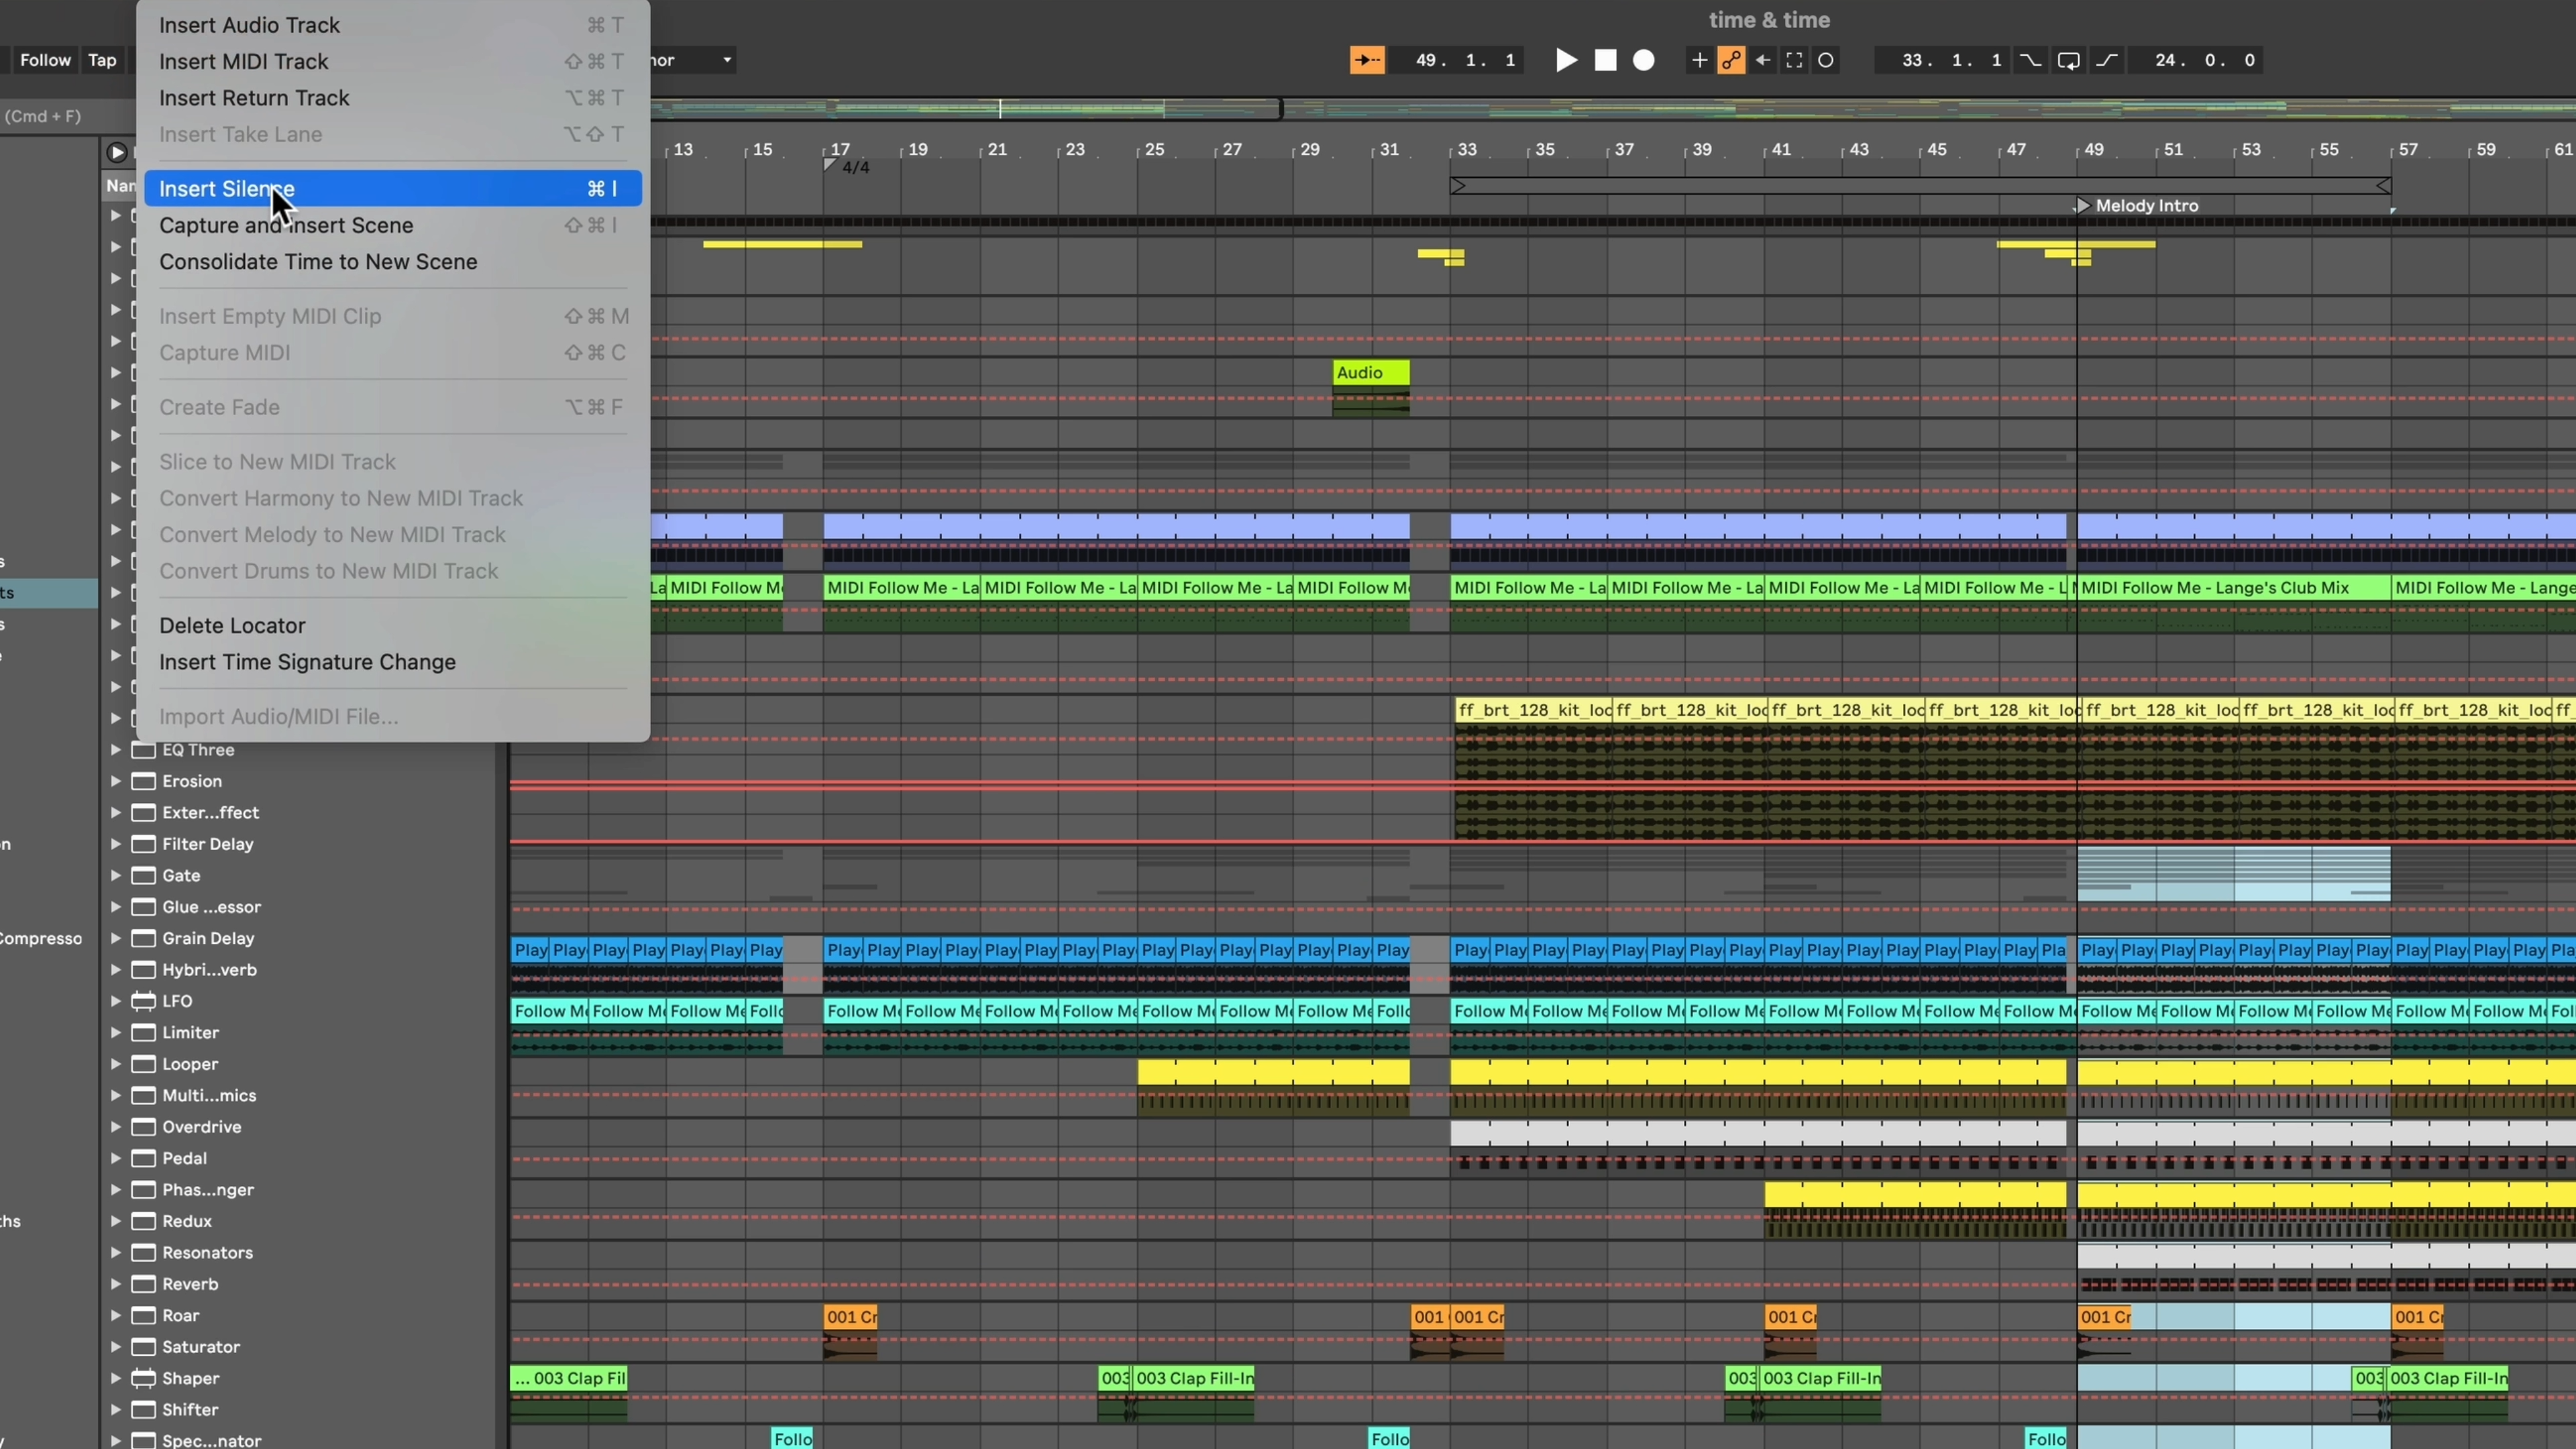
Tip #1: Insert Time
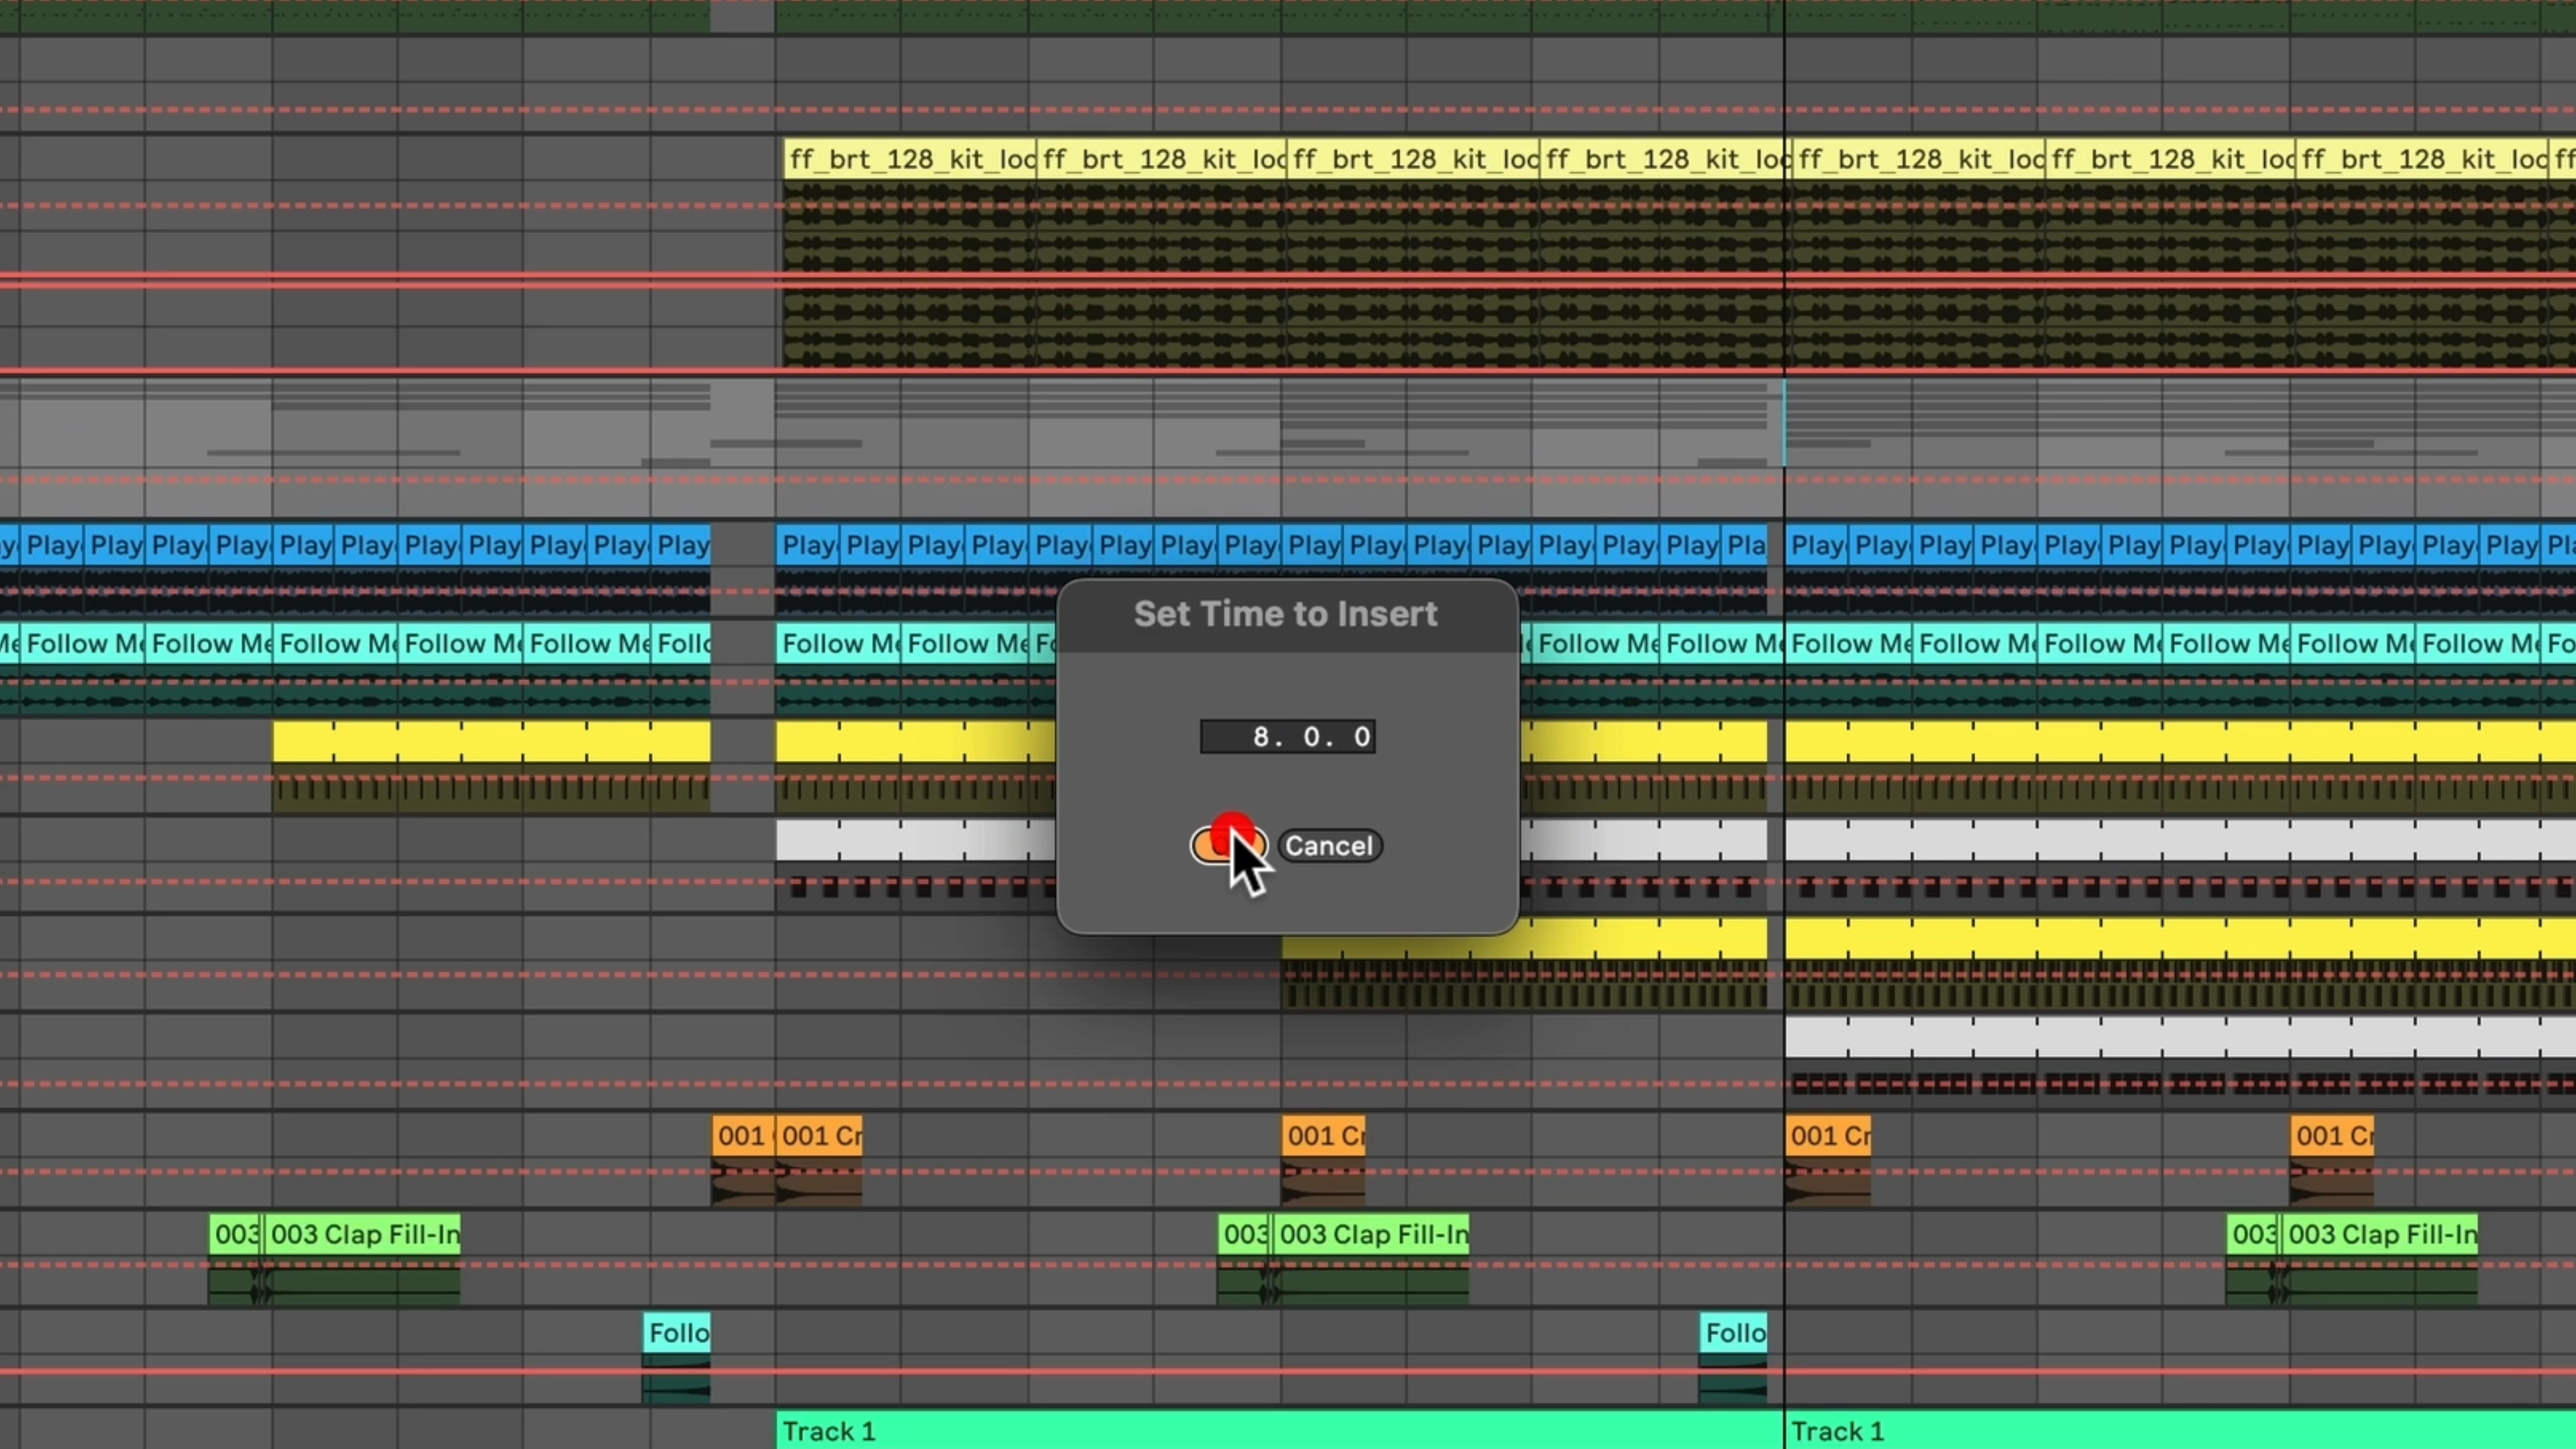
Have an intro but feel like it needs 8 more bars to build the energy?
- Click on the grid where you want to add time
- Press
Cmd + I(Mac) orCtrl + I(PC) - Or go to
Create > Insert Silence - Type the number of bars, and hit OK.
Your arrangement expands, automation stays untouched!
Tip #2: Delete Time
Want to quickly remove a section?
- Highlight the section
- Go to
Edit > Delete Time
Done. Clean, precise, efficient.
Tip #3: Copy-Paste Section
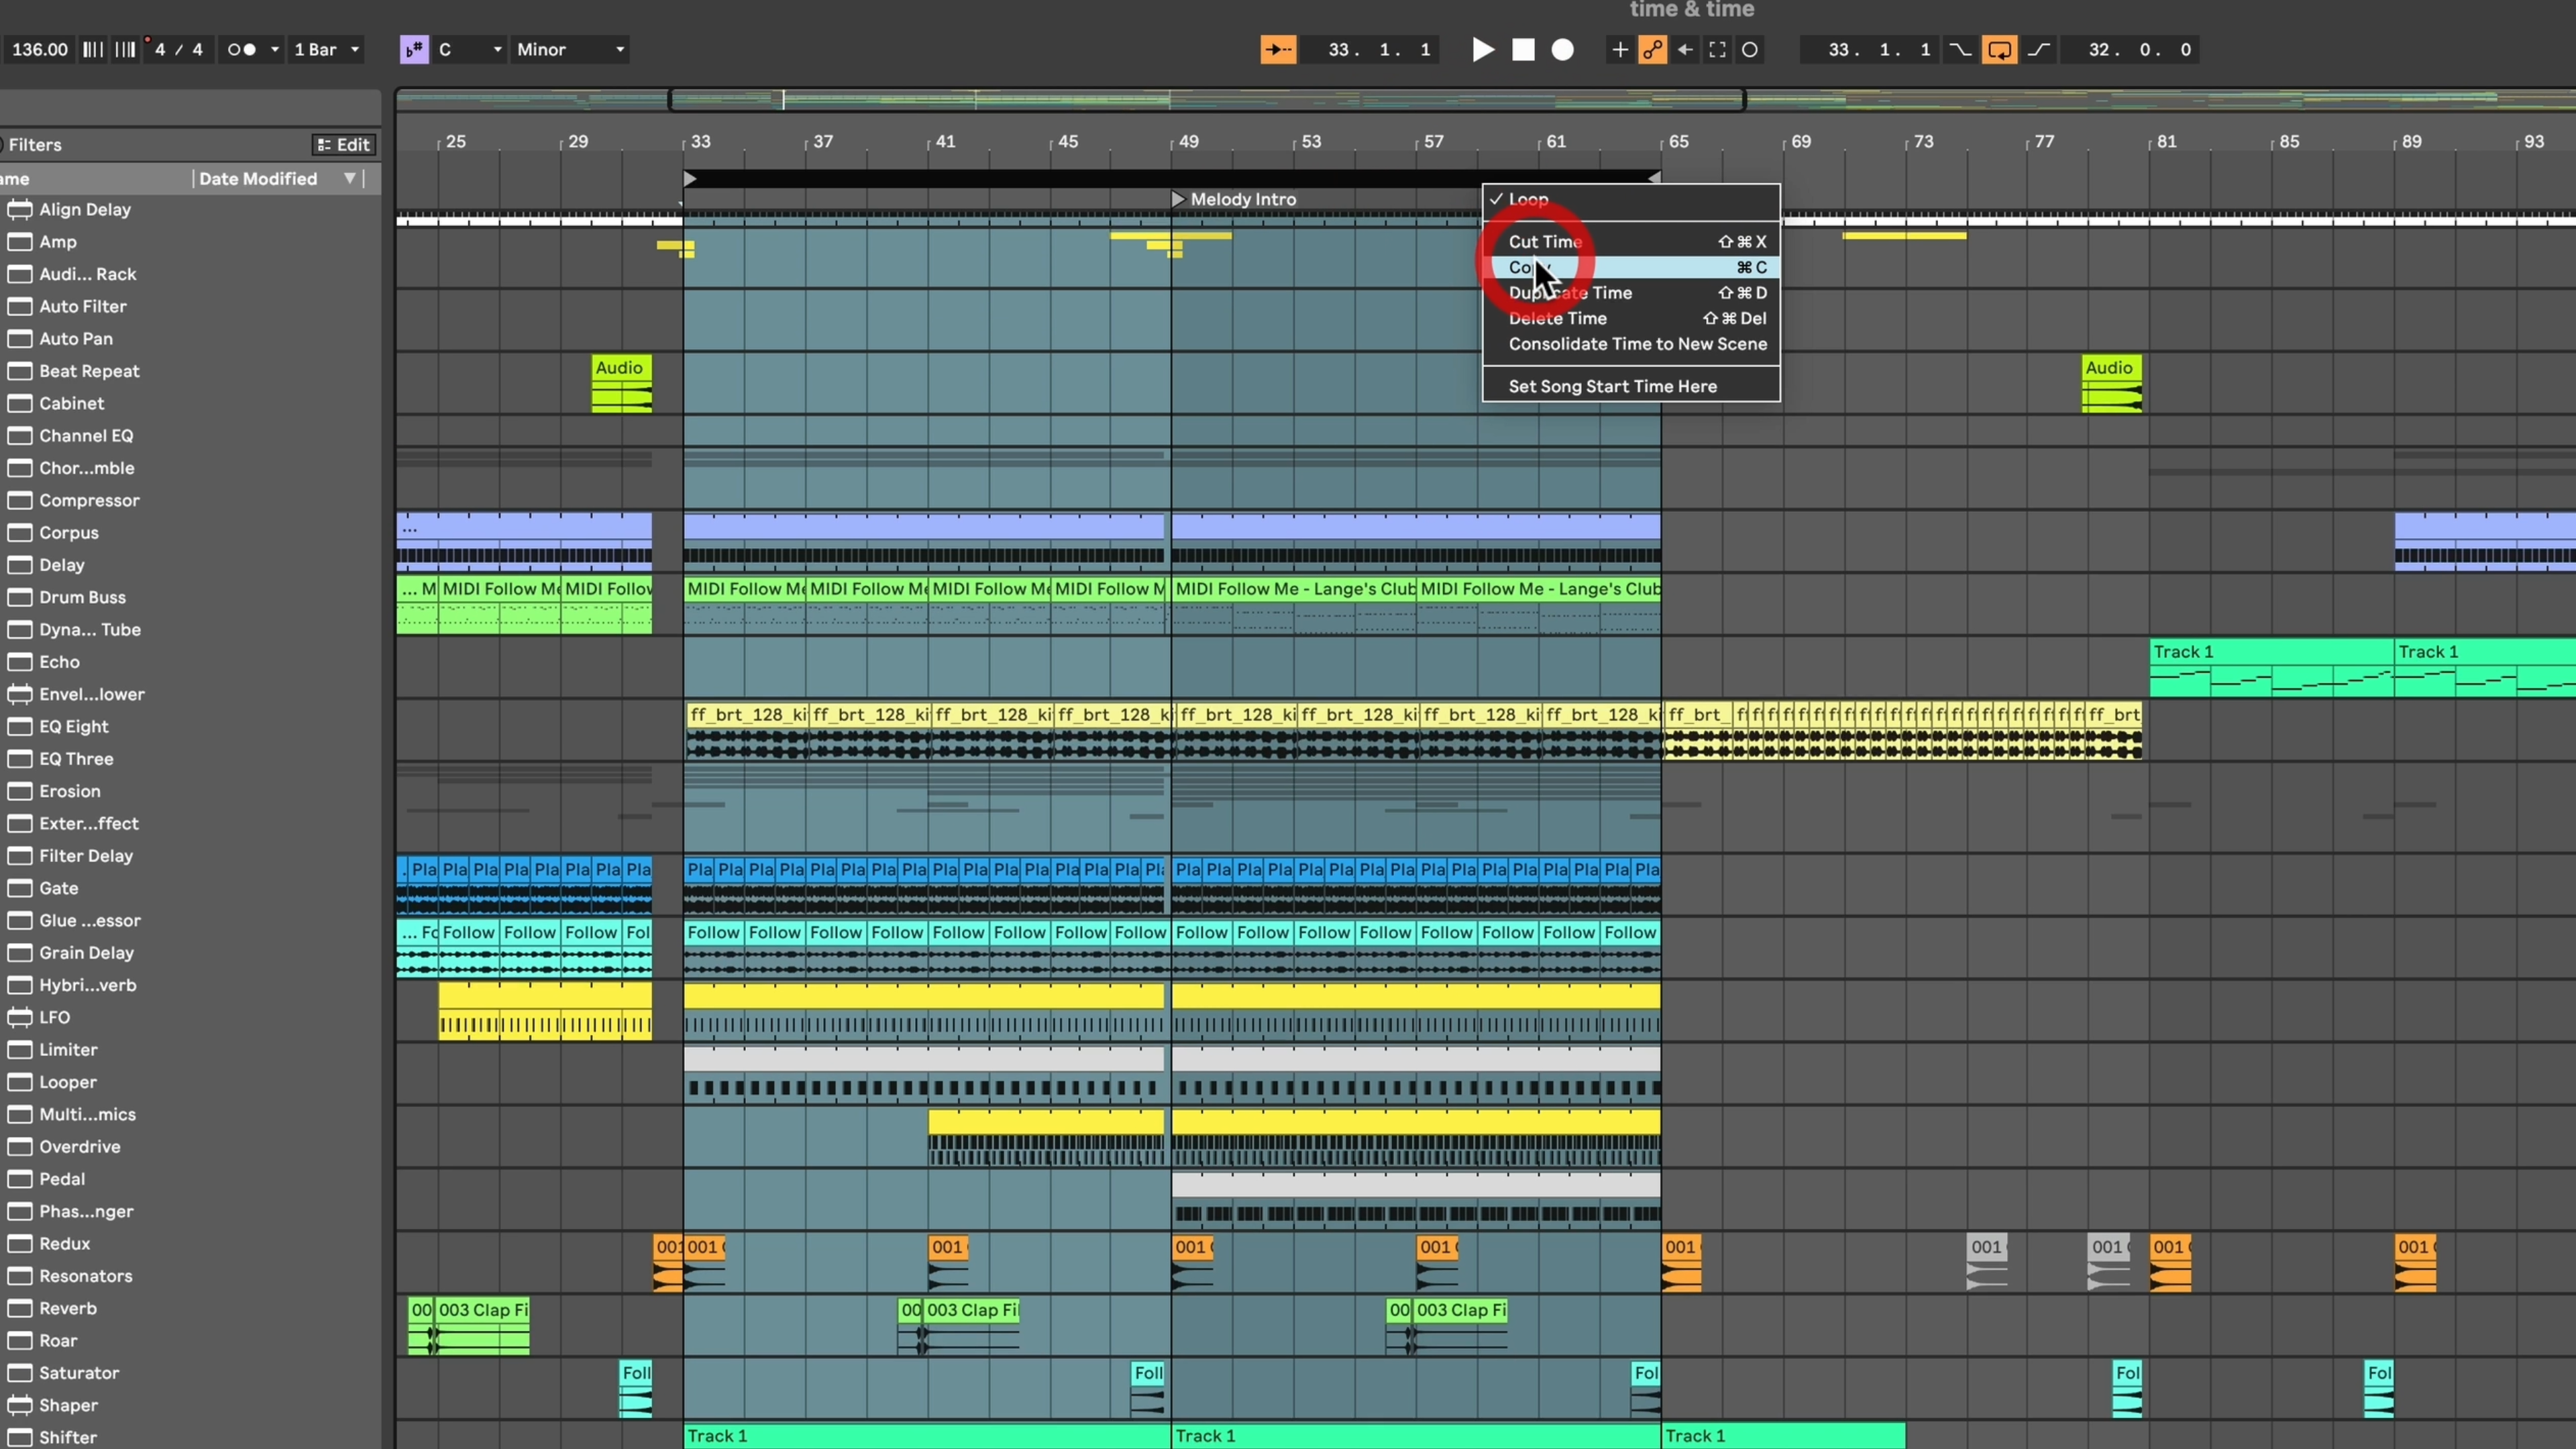
Running out of time before your gig?
- Highlight the intro
- Hit
Cmd + CorCtrl + C - Move to the outro
- Press
Cmd + VorCtrl + V
🎁 Bonus Tip:
If you forget to unlock automation before pasting, hit Cmd + Z, unlock it, and paste again.
Tip #4: Create Your Own Ableton Experience
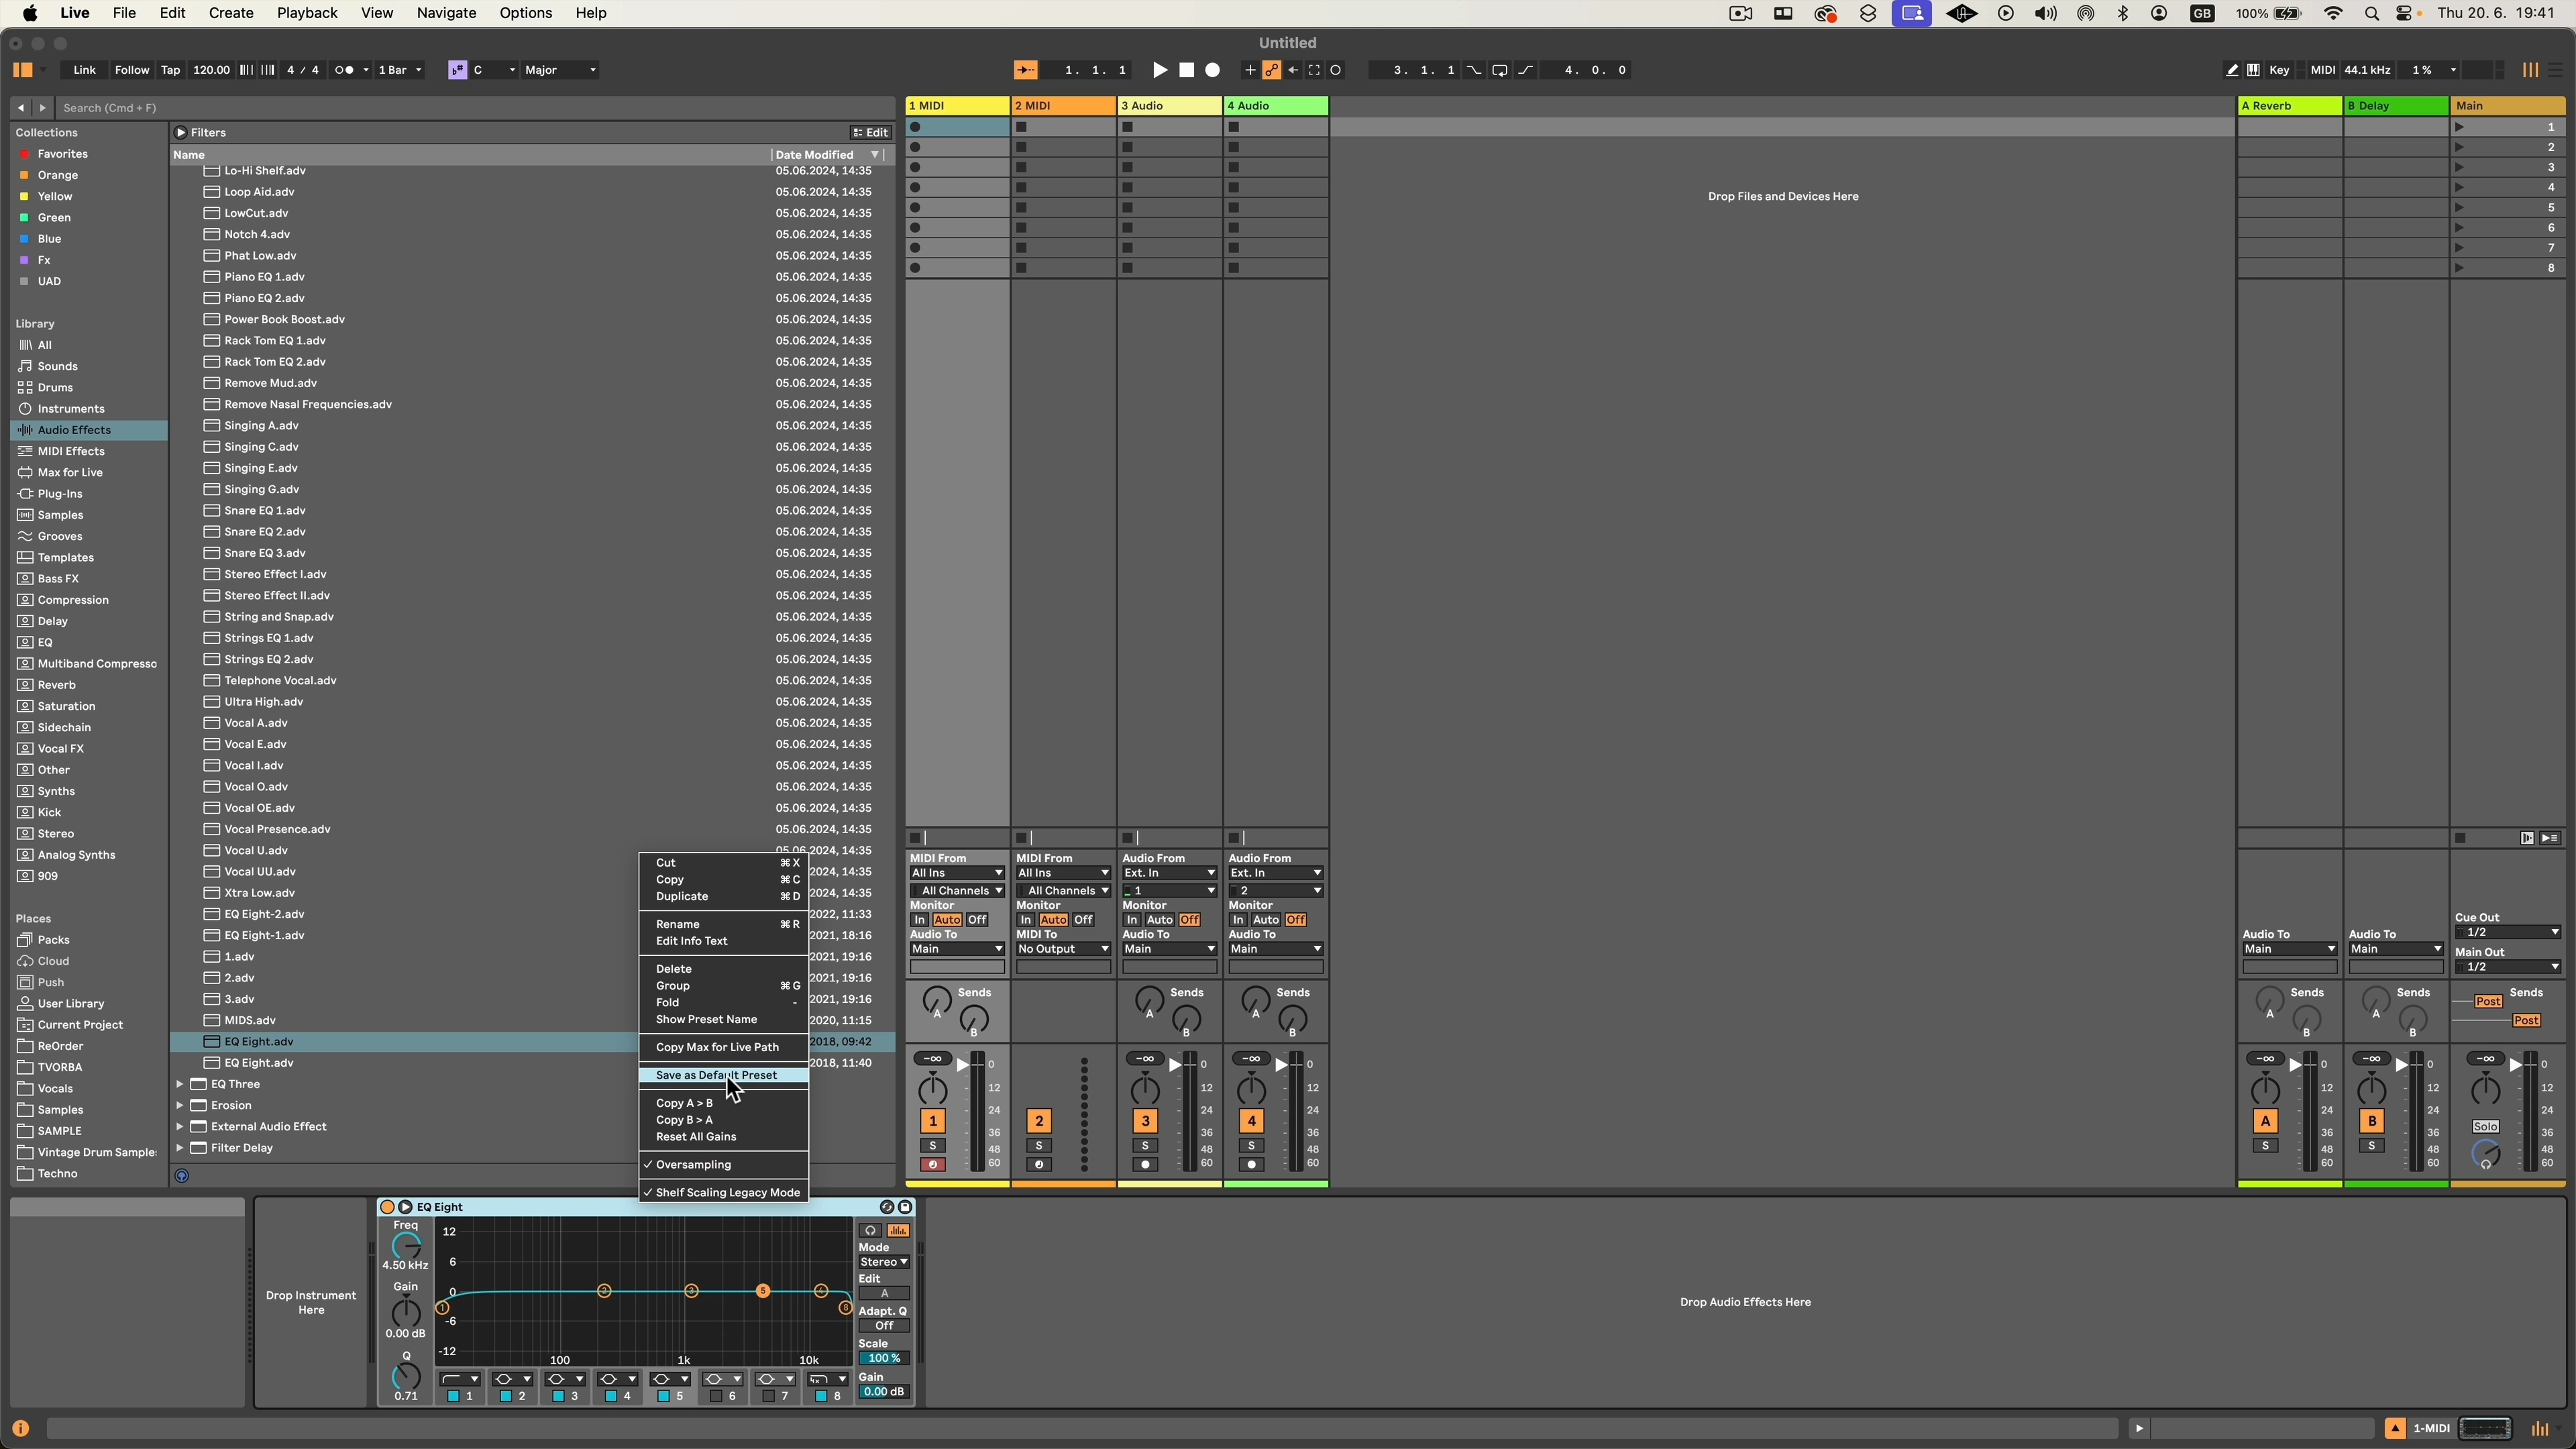
Always using the same EQ or effect setup?
- Right-click the top bar of the device
- Click “Save as Default Preset”
Next time, it’s instantly ready with your favorite settings.
Tip #5: Linked Tracks
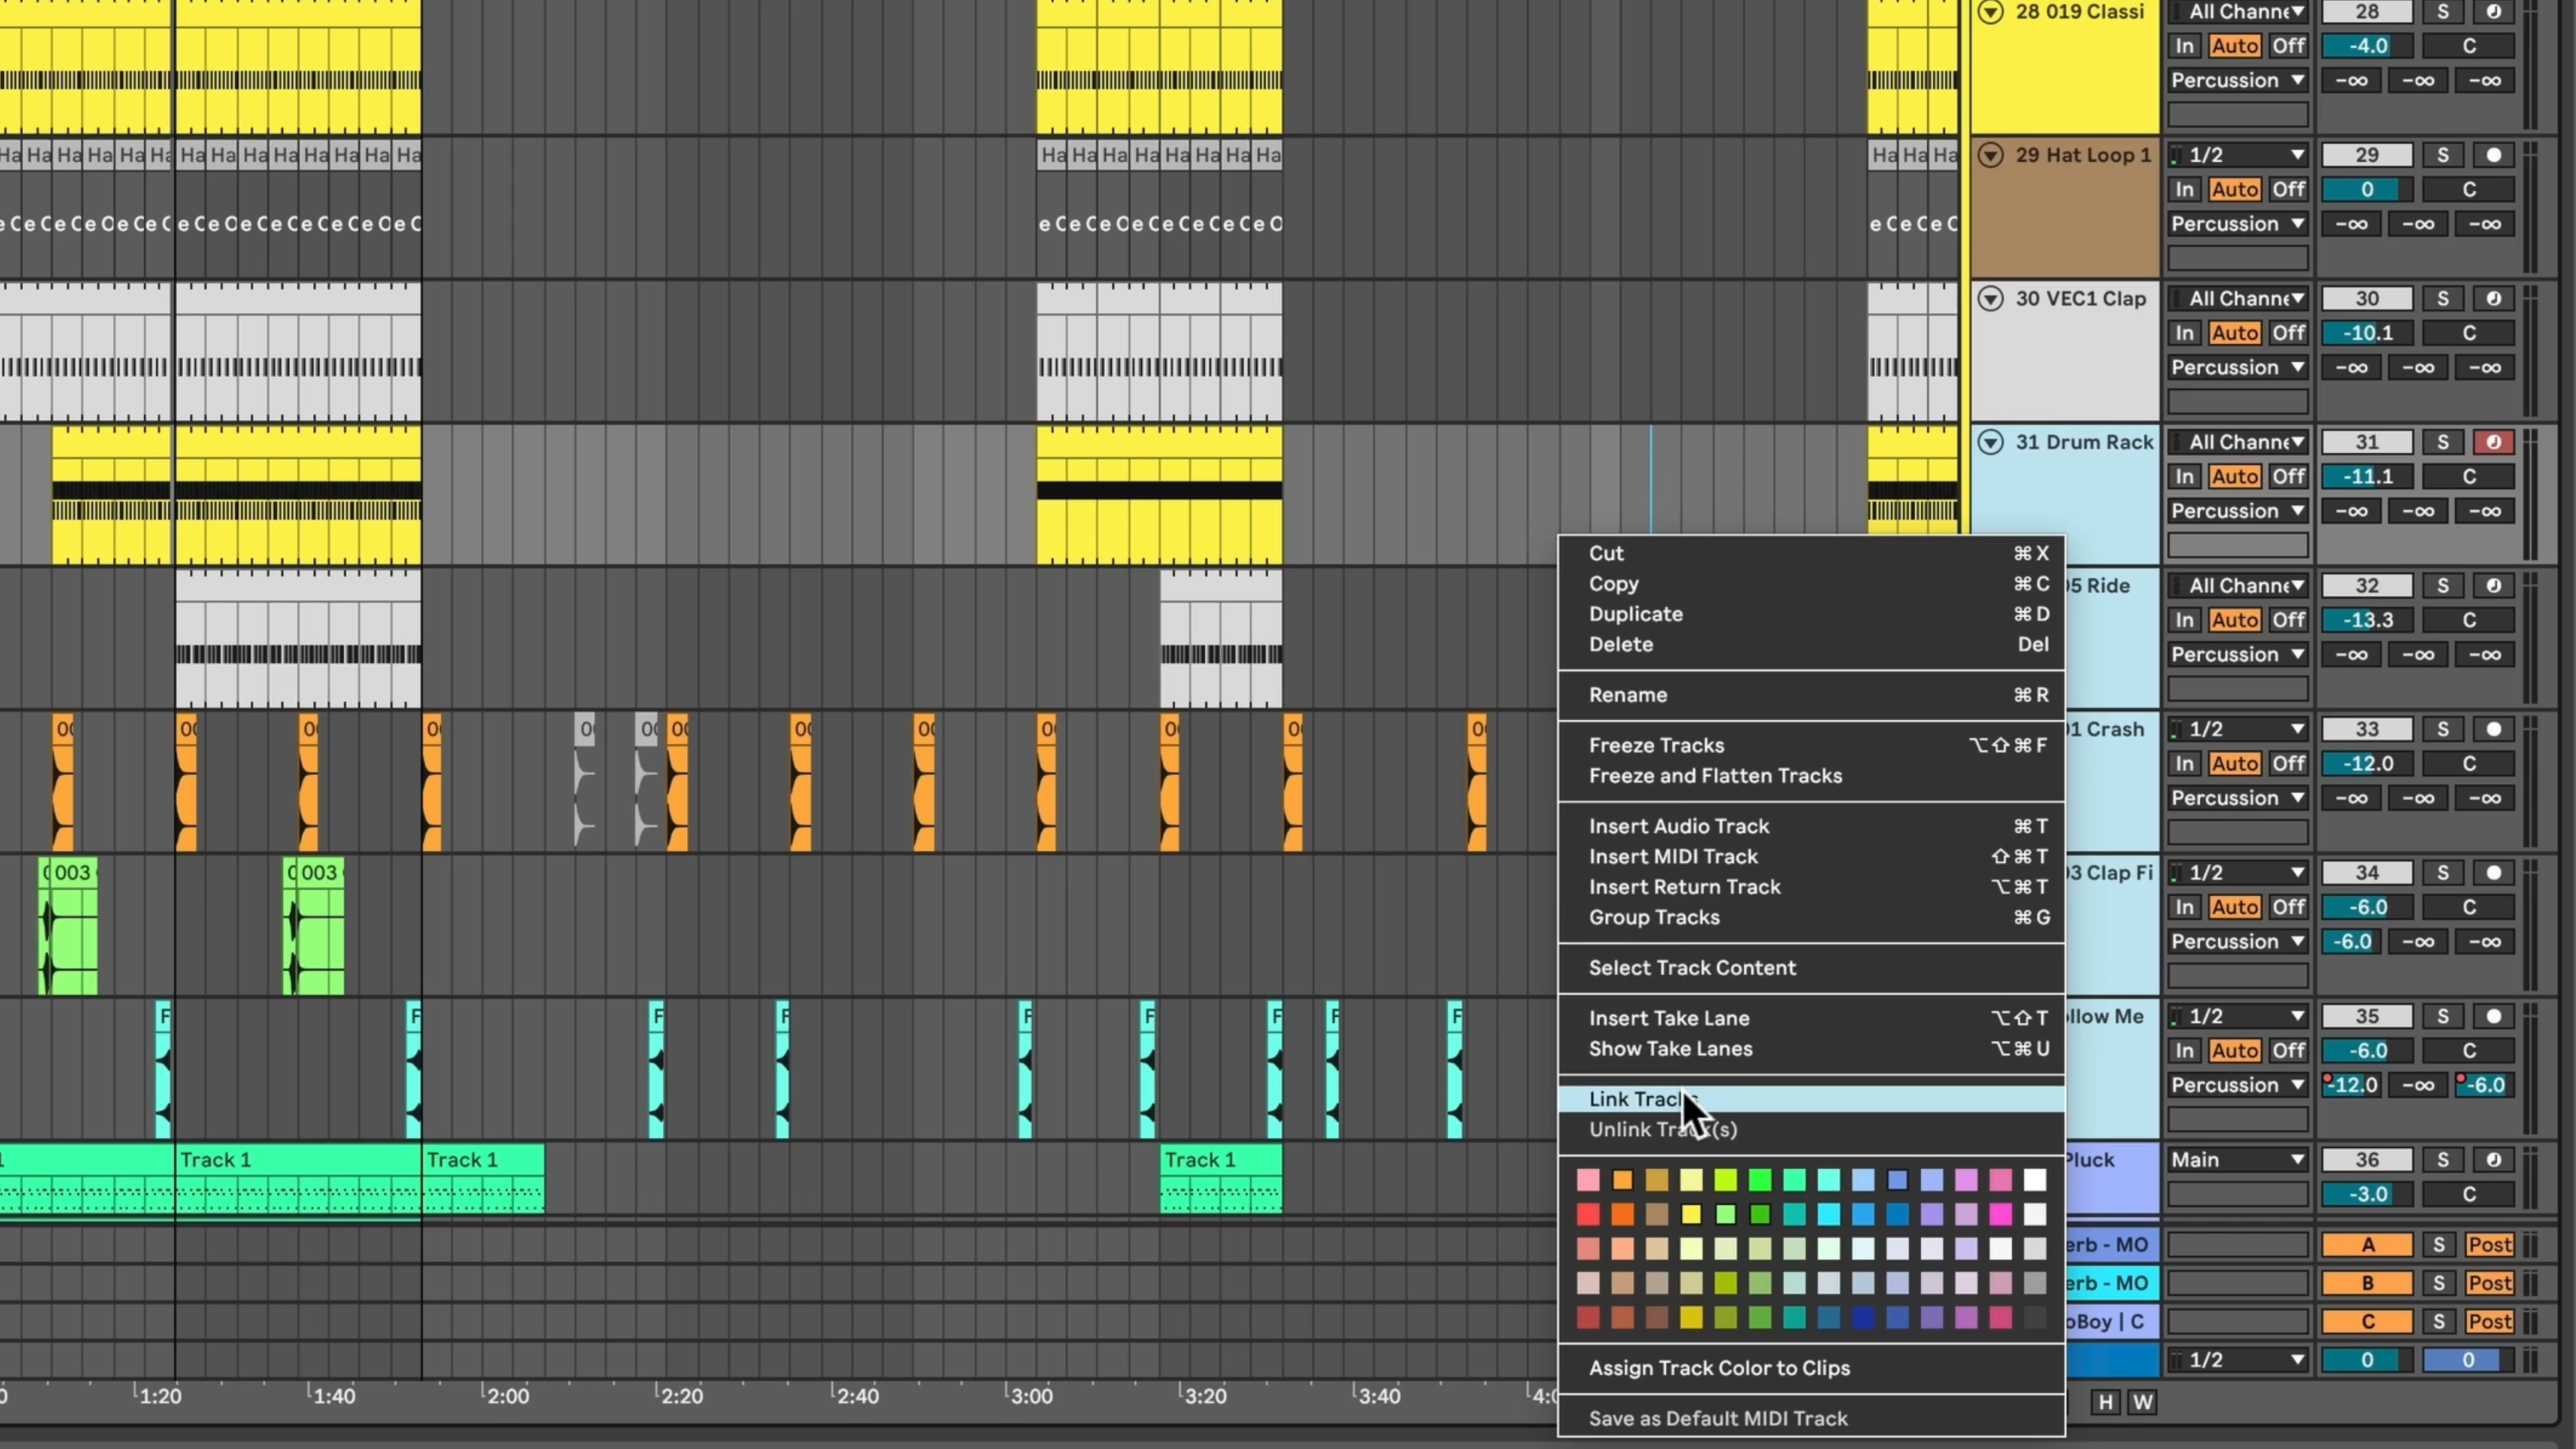
Want to move multiple tracks together?
- Select tracks with
Cmd/Ctrl + Click - Right-click > “Link Tracks”
Now they move and adjust in sync — volume, effects, everything.
Tip #6: Save File Settings
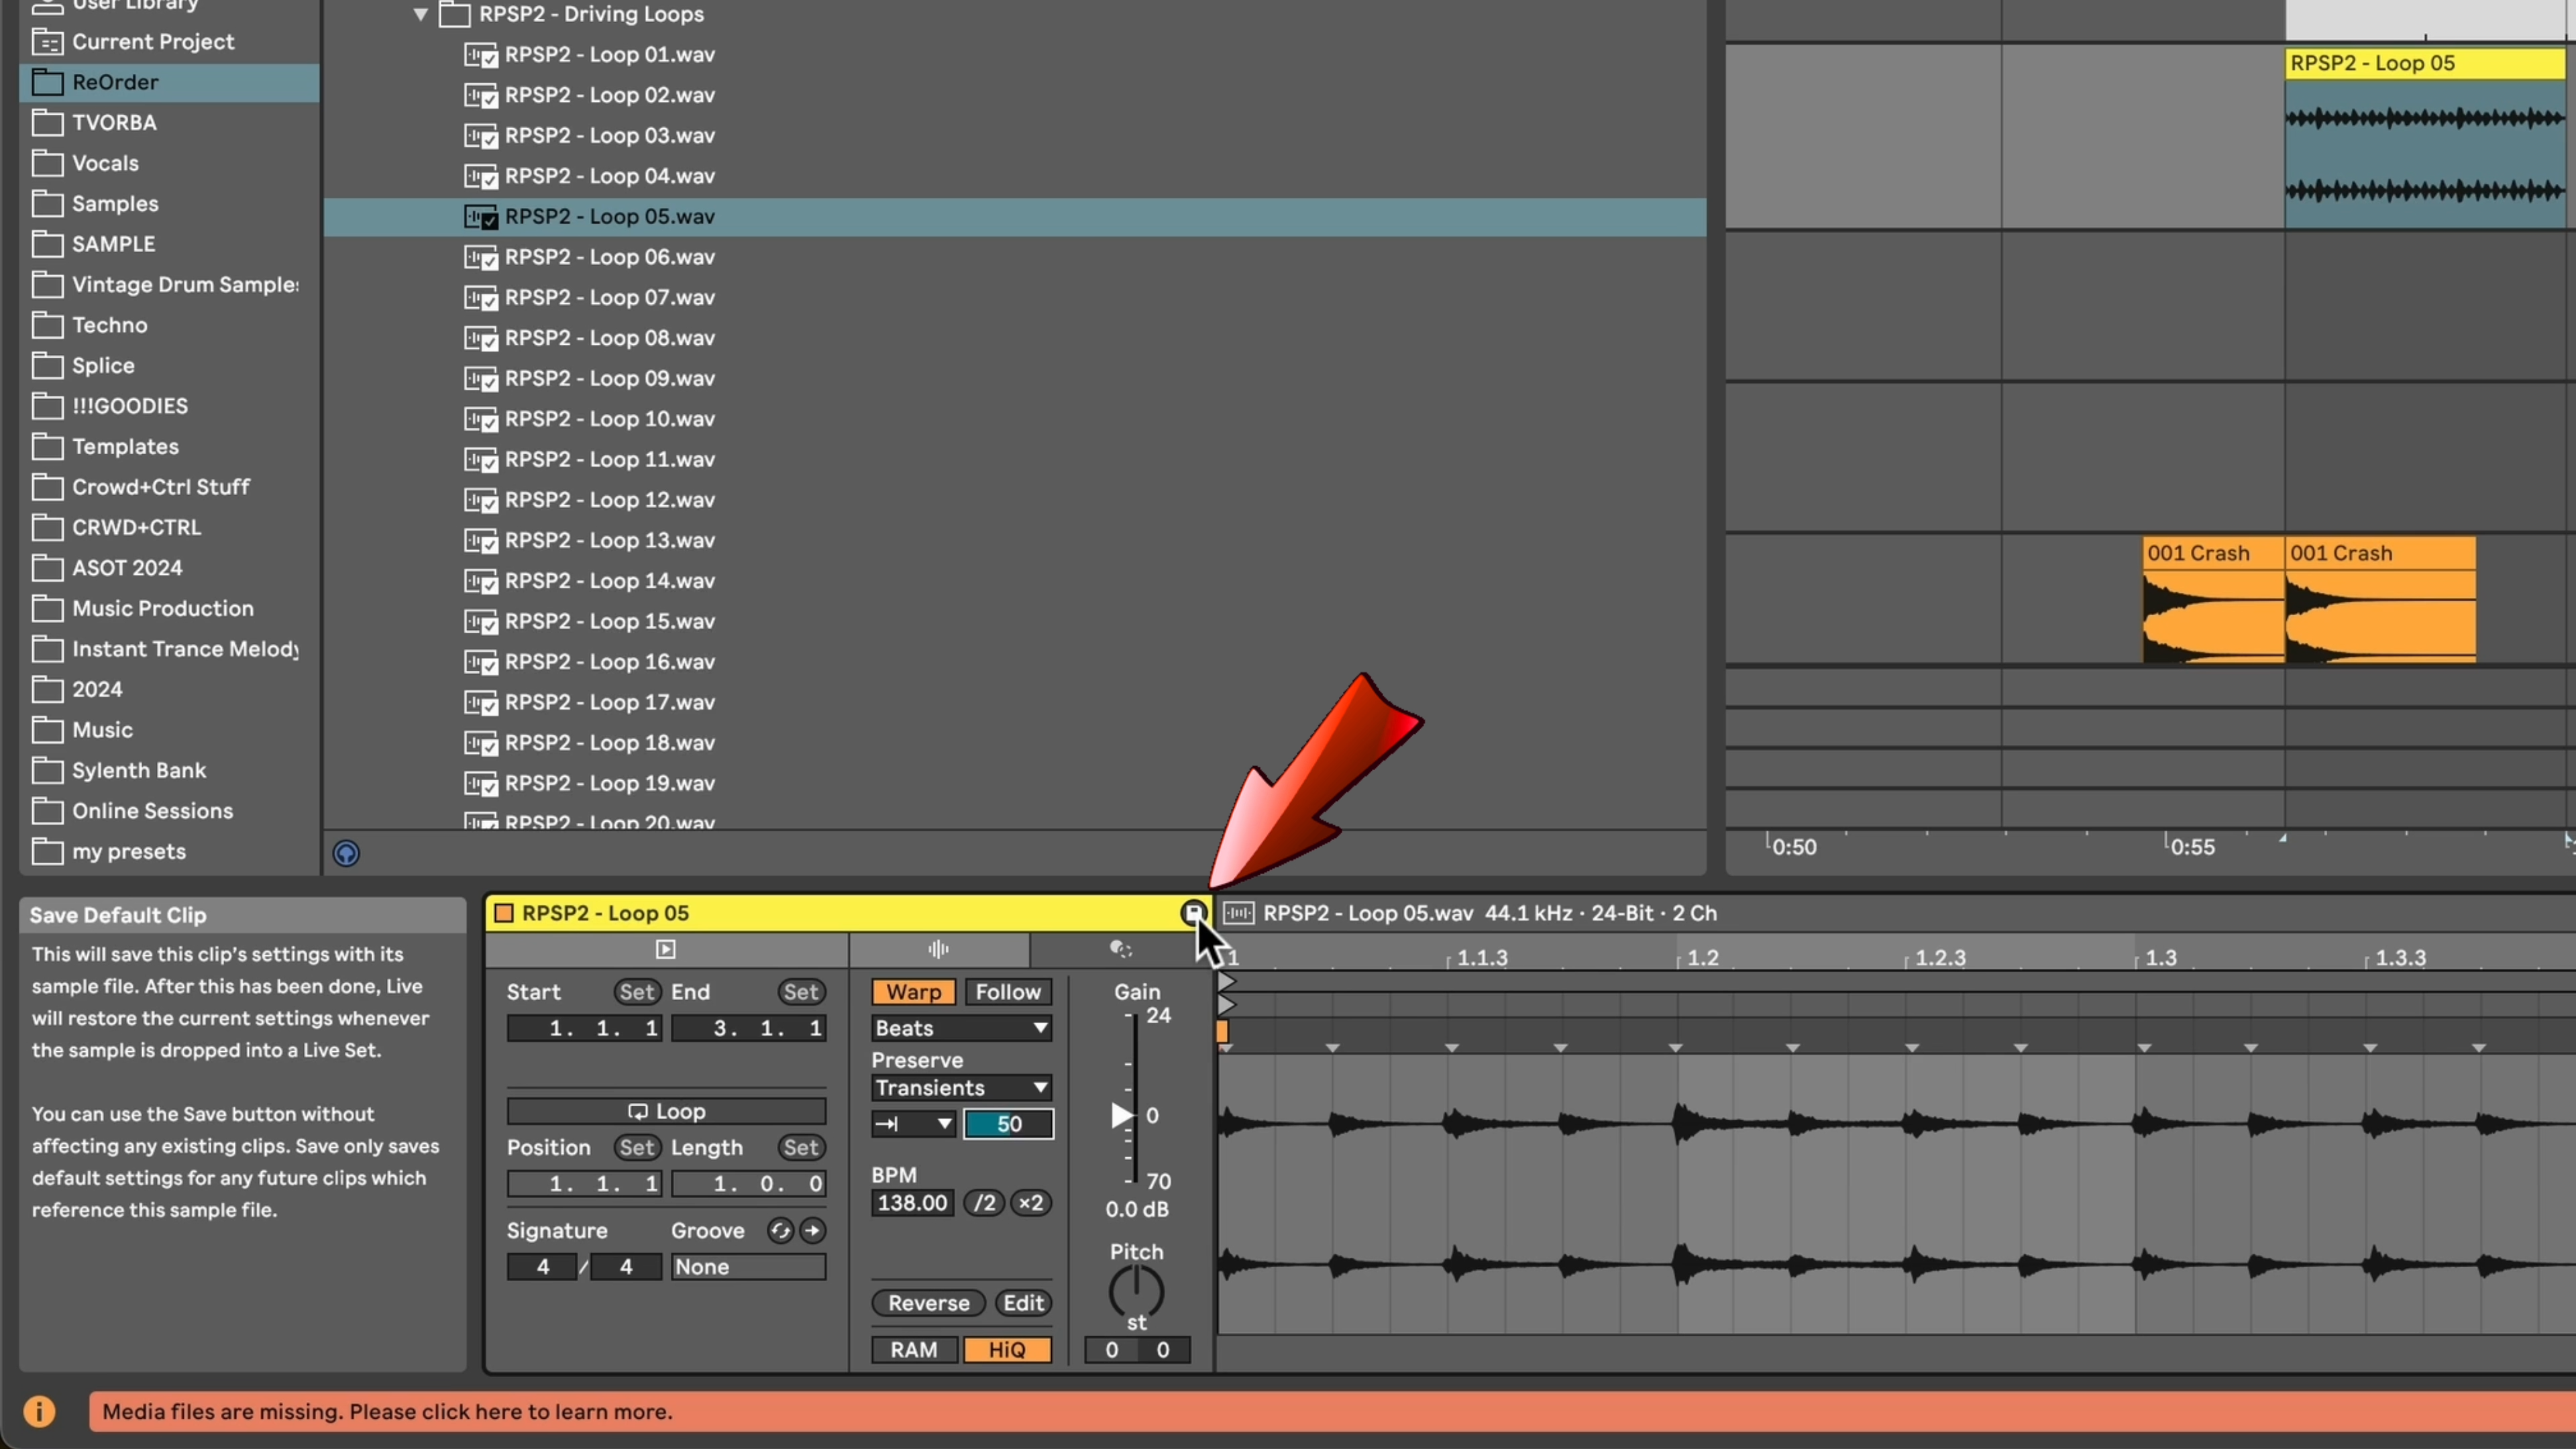
Customized a sample (warping, gain, etc.)?
- Hit “Save” in the sample display
Ableton will remember those settings across projects!
Tip #7: Consolidate and Freeze
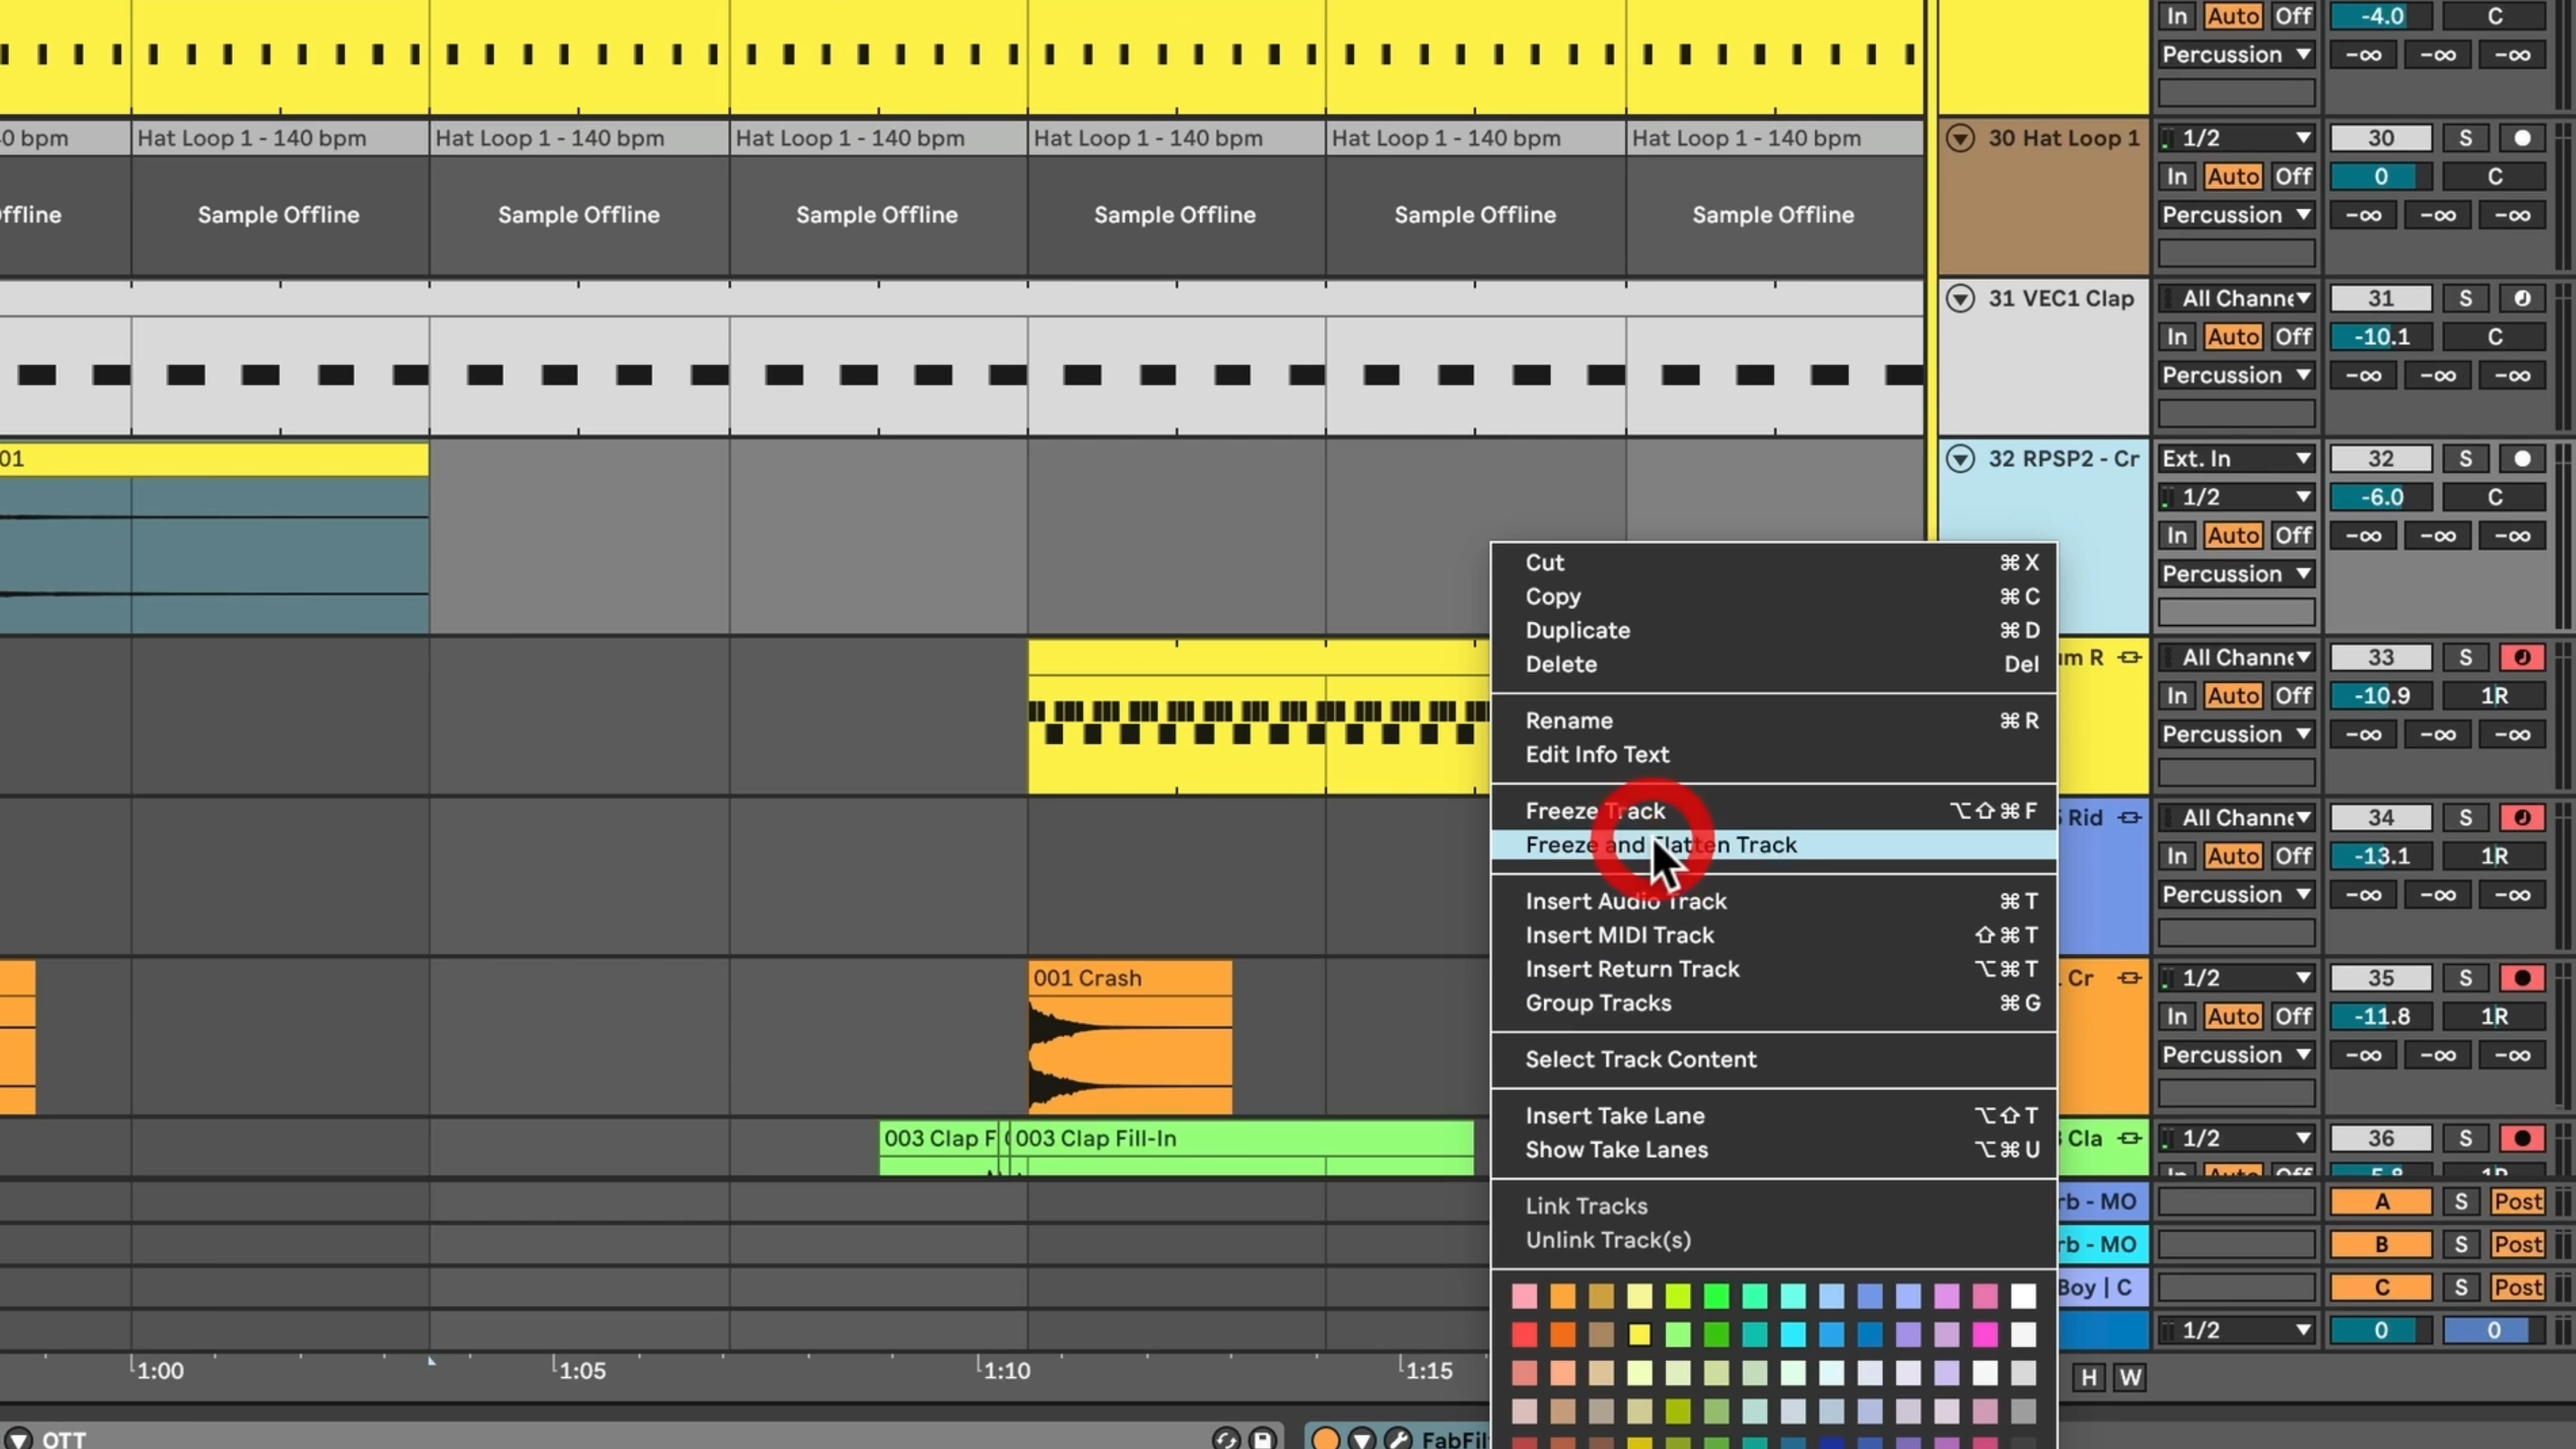
Heavy plugins? CPU lag?
- Freeze and Flatten the track
- Now it’s a clean audio file you can reuse anytime
Perfect for loops and FX!
Tip #8: Collaboration
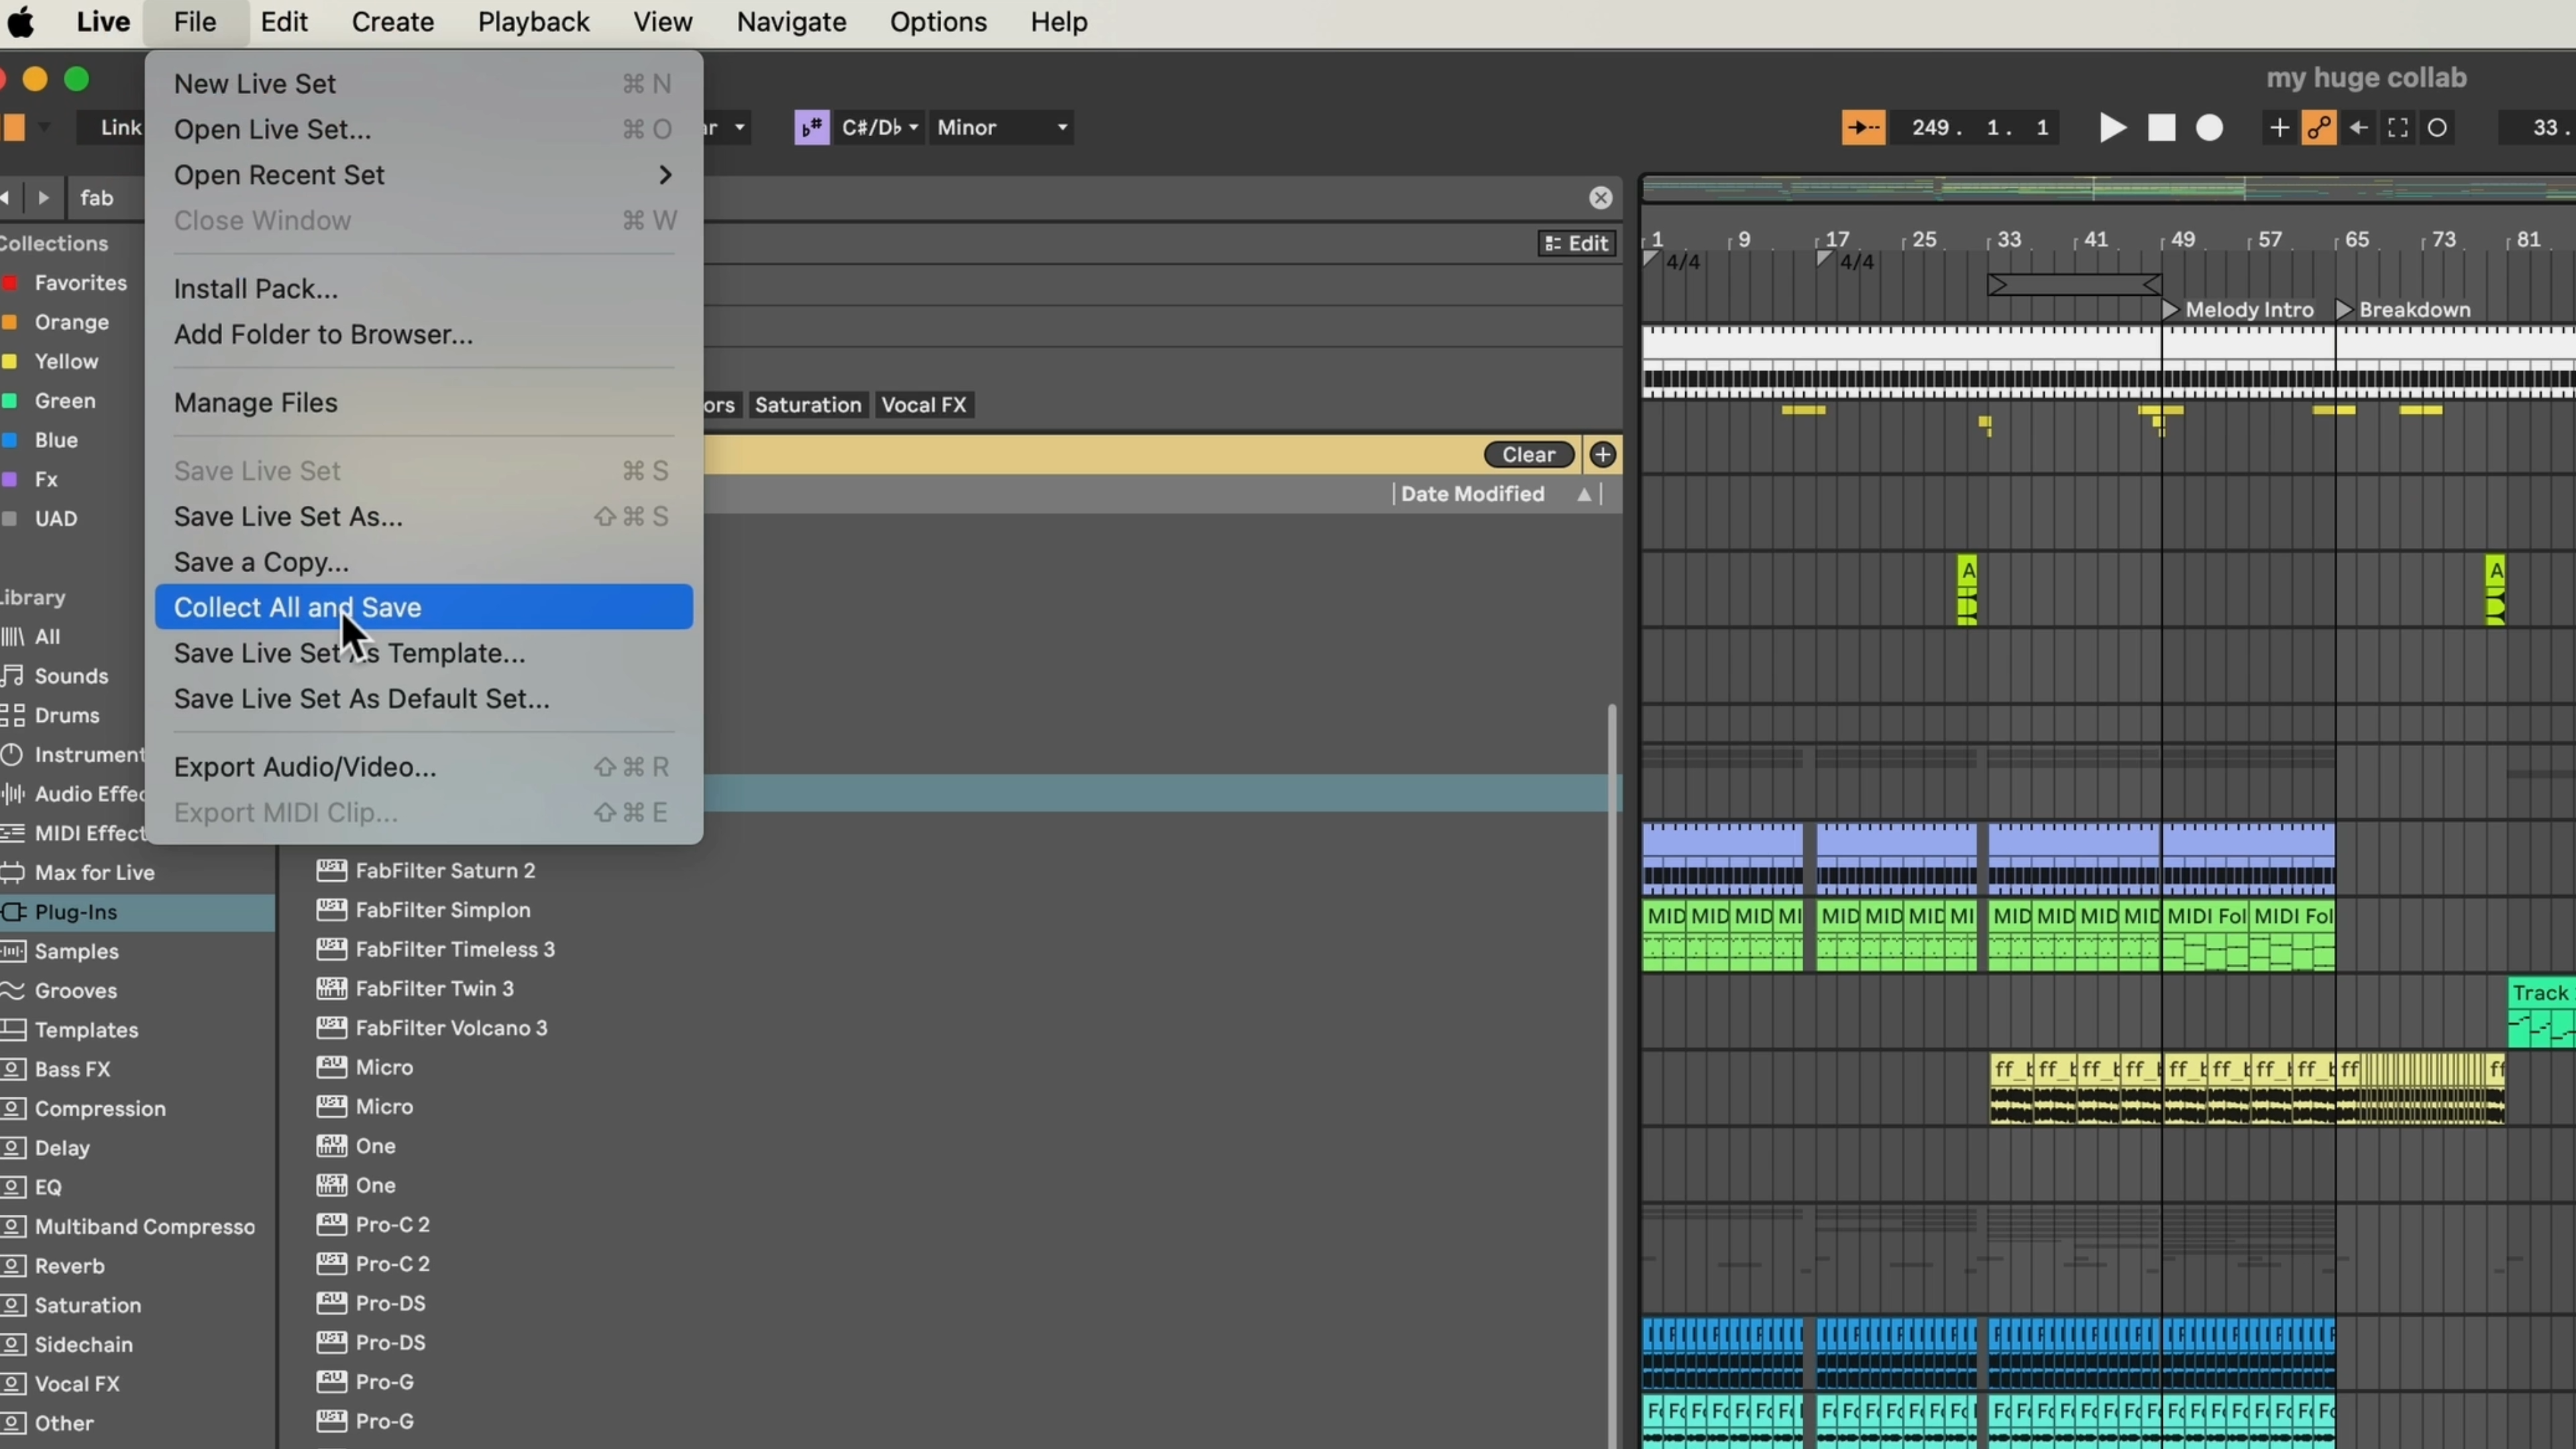
Working with a friend?
- Save to a fresh folder
- Go to
File > Collect All and Save
Now all samples, racks, and effects are bundled. Share via Dropbox or WeTransfer with zero issues.
Tip #9: Sample Hot Swap

Need to swap a kick sample mid-track?
- Double-click the sample
- Right-click > Manage Sample File
- Drag and drop a new sample
Instantly replaces all instances — a true timesaver!
Tip #10: Quickest Chords Ever!
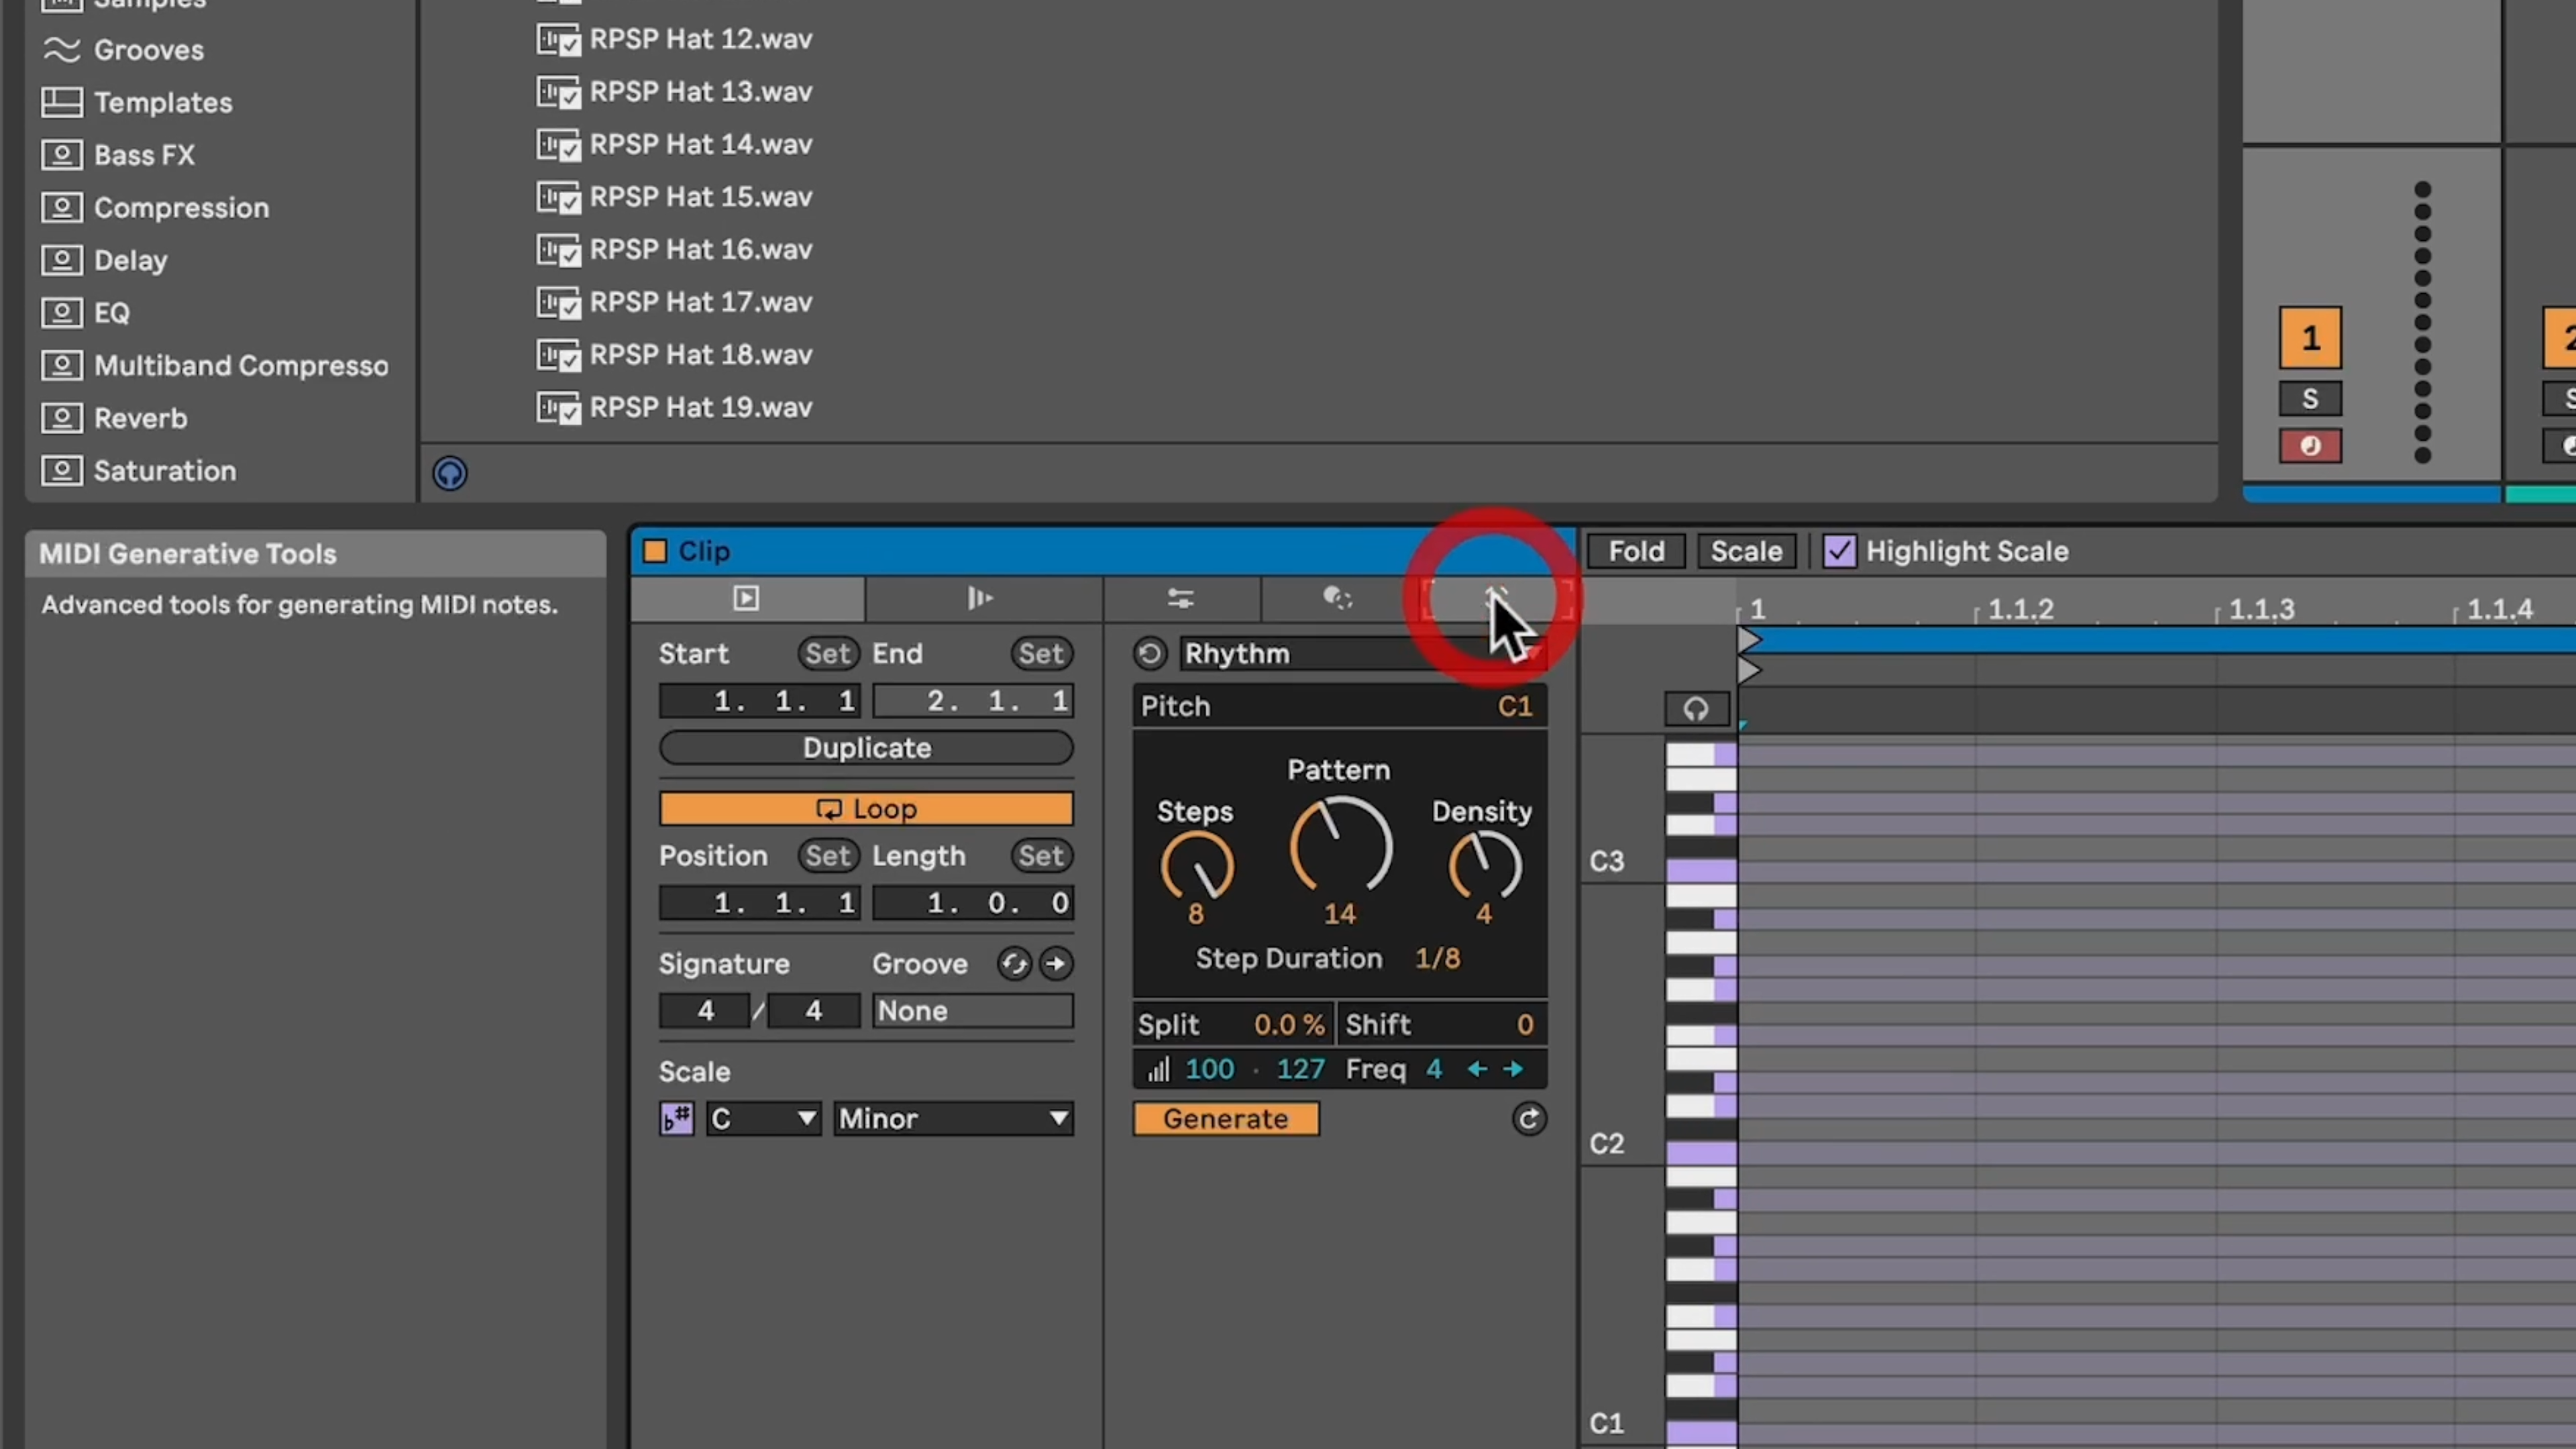
Ableton 12’s MIDI Generative Tool is gold!
- Insert a MIDI track
- Open the MIDI Generative Tool > Select “Stacks”
- Choose root notes, inversions, and variations
Perfect for instant chord progressions, even if you’re not a theory wizard.
Got any tricks of your own? Drop them in the comments — let’s level up together. 🔥